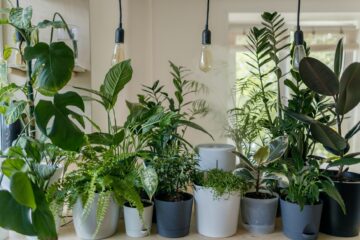
Repotting is an essential part of houseplant care, helping plants continue to grow, thrive, and stay healthy. However, many plant owners worry about damaging delicate roots during the process. The good news is that with the right approach, you can successfully repot your houseplants while minimising stress and preventing root damage. In this guide, we’ll explain when to repot, how to do it safely, and why keeping records of your plant care can help you achieve even better results.
Why Repotting Is Important
Houseplants rely on the soil in their pots for nutrients, moisture, and root support. Over time, roots can outgrow their containers, becoming root-bound as they circle tightly around the pot. When this happens, plants may experience slower growth, reduced water absorption, and nutrient deficiencies.
Repotting provides fresh growing medium, additional space for root development, and an opportunity to inspect the plant’s overall health. Most houseplants benefit from repotting every one to three years, although growth rates vary depending on the species.
Signs Your Houseplant Needs Repotting
Before reaching for a larger pot, look for these common signs that a plant is ready for repotting:
- Roots growing through drainage holes.
- Water running straight through the pot without soaking into the soil.
- Slower than normal growth.
- Yellowing leaves despite proper care.
- Soil drying out very quickly.
- Roots visible on the soil surface.
Identifying these signs early helps you repot before the plant becomes severely root-bound.
Choose the Right Pot
Selecting an appropriately sized pot is one of the most important steps. Avoid choosing a container that is dramatically larger than the current one. Excess soil can hold too much moisture, increasing the risk of root rot.
A pot that is approximately 2 to 5 centimetres wider in diameter than the existing container is usually ideal. Always ensure the new pot has drainage holes to help excess water escape.
Prepare Before Removing the Plant
Water your houseplant a day before repotting. Slightly moist soil holds together better and reduces stress on the root system when removing the plant from its container.
Gather everything you need before starting:
- New pot.
- Fresh houseplant compost or potting mix.
- Hand trowel.
- Gloves if desired.
- Clean pruning scissors.
Working efficiently reduces the amount of time roots are exposed to air.
How to Remove the Plant Safely
Gently turn the pot on its side while supporting the base of the plant. Tap the sides and bottom of the pot to loosen the root ball. Avoid pulling the plant by its stems or leaves, as this can cause damage.
If the roots are tightly packed against the pot, carefully run a blunt knife or similar tool around the inside edge to loosen the root ball.
Once removed, inspect the roots. Healthy roots are usually white or light brown and feel firm. Remove any roots that are black, mushy, or rotting using clean, sterilised scissors.
Loosen the Root Ball Carefully
One of the biggest mistakes gardeners make is aggressively tearing apart the root ball. Instead, gently tease apart any circling roots using your fingers.
For heavily root-bound plants, lightly loosen the outer layer of roots to encourage them to grow outward into the new potting mix. Be patient and avoid excessive force, as healthy roots are essential for rapid recovery after repotting.
Repotting the Plant
Add a layer of fresh potting mix to the bottom of the new container. Position the plant so that it sits at the same depth as it did in its previous pot.
Fill around the root ball with fresh compost, gently firming the soil as you go. Do not pack the soil too tightly, as roots require access to air as well as moisture.
Leave a small gap between the soil surface and the pot rim to make watering easier.
Aftercare Following Repotting
Water the plant thoroughly after repotting to help settle the soil around the roots. Place the plant in a location with suitable light conditions and avoid direct, intense sunlight for a few days if the plant appears stressed.
It is also best to avoid fertilising immediately after repotting. Fresh potting mix often contains nutrients, and giving the roots time to establish can reduce the risk of shock.
Monitor the plant closely over the following weeks and look for signs of healthy new growth.
Record Your Results in a Gardening Journal
Repotting success can vary depending on the plant species, soil used, time of year, and growing conditions. Keeping detailed records helps you learn what works best for your collection.
The GardensAndGardening Online Garden Journal is an excellent tool for tracking all aspects of houseplant care. You can record repotting dates, note the pot size used, document soil mixes, track watering schedules, and keep photographs of your plants’ progress over time.
Maintaining a digital gardening journal allows you to identify patterns, compare growth rates, and remember important maintenance tasks. If a particular houseplant thrives after repotting, you’ll have a complete record of exactly what you did. Likewise, if problems occur, your journal can help identify potential causes.
For gardeners with growing indoor plant collections, the GardensAndGardening Online Garden Journal provides a convenient way to organise plant care records, monitor plant health, and build a valuable gardening reference library for future success.
Final Thoughts
Learning how to repot houseplants without damaging their roots is a valuable skill that helps keep indoor plants healthy and attractive. By choosing the right pot, handling roots carefully, and providing proper aftercare, you can minimise transplant shock and encourage strong growth. Pairing good plant care with detailed record-keeping in the GardensAndGardening Online Garden Journal will help you become a more confident and successful houseplant gardener over time.