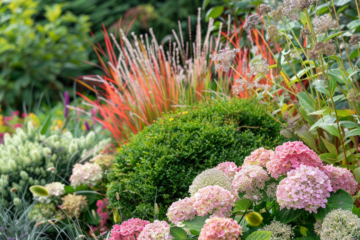
Lavender, with its fragrant blooms and versatile uses, is a beloved addition to any garden. Propagating lavender through cuttings is an excellent way to expand your lavender collection or share its beauty with friends and family. In this comprehensive guide, we will walk you through the process of taking cuttings from lavender, enabling you to propagate this lovely herb and enhance your garden with its delightful presence.
Supplies Needed
Before diving into the cutting process, gather the following supplies:
- Healthy Lavender Plant: Choose a healthy, established plant as the source for your cuttings.
- Sharp Pruning Shears or Scissors: Clean and sharp tools will ensure a smooth and precise cutting process.
- Rooting Hormone (Optional): Rooting hormone can aid in the development of roots on the cuttings, increasing their chances of successful propagation.
- Potting Mix: Prepare a well-draining potting mix, such as a blend of perlite and compost, to plant the lavender cuttings.
- Pots or Containers: Small pots or containers for planting the cuttings.
- Clear Plastic Bags or Domes: These will create a humid environment to encourage root development.
Step-by-Step Guide to Taking Lavender Cuttings
Step 1: Selecting and Preparing the Plants
- Choose healthy and non-flowering stems for your cuttings. Early summer is an ideal time for taking lavender cuttings.
- Water the lavender plant the day before taking cuttings to ensure the stems are adequately hydrated.
Step 2: Taking the Cuttings
- Use sharp pruning shears or scissors to take 6-inch (15 cm) long stem cuttings. Ensure the cuttings have at least two sets of leaves.
- Remove any lower leaves from the cuttings to expose the nodes where roots will develop.
Step 3: Rooting Hormone (Optional)
- If you choose to use rooting hormone, dip the bottom inch of the cutting into the hormone to encourage root development.
Step 4: Planting the Cuttings
- Fill small pots with the potting mix, moisten the mix, and insert the lavender cuttings about an inch deep.
- Space the cuttings in the pots to allow for good air circulation around each cutting.
Step 5: Creating a Humid Environment
- Cover the pots with clear plastic bags or domes to create a humid environment that will help the cuttings retain moisture.
- Place the pots in a warm and bright location, but away from direct sunlight.
Step 6: Care and Maintenance
- Mist the cuttings and monitor the moisture levels of the potting mix, ensuring it remains consistently moist but not waterlogged.
- After a few weeks, gently tug on the cuttings to check for resistance, indicating that roots have developed.
Step 7: Transplanting the Lavender Cuttings
- Once the cuttings have developed a healthy root system, transplant them into individual larger pots or your garden.
- Gradually expose the newly transplanted cuttings to direct sunlight to acclimate them to outdoor conditions.
Conclusion
Taking cuttings from lavender is a rewarding and cost-effective method of propagating this delightful herb. By following the step-by-step guide outlined in this article and providing proper care and attention, you can successfully propagate lavender, expanding your garden and sharing the beauty and fragrance of lavender with those around you. Embrace the art of propagation and witness your lavender cuttings develop into flourishing plants that will enhance your garden with their aromatic blooms for years to come.
Keep on top of your gardening with our free online journal
Our free online tool allows you to organise your ideas and garden plans and help you be as efficient as possible in the garden.
Sign up now