Water conservation is becoming increasingly crucial as climate change and population growth strain freshwater resources worldwide. One of the simplest, most effective ways homeowners can contribute to water conservation while nurturing lush, healthy gardens is by harvesting rainwater. Rainwater harvesting involves collecting and storing rainwater from rooftops, surfaces, or other catchments for later use. Implementing a rainwater harvesting system for your home garden not only reduces dependency on municipal water supplies but also provides a free, chemical-free water source perfect for watering plants.
Whether you’re a seasoned gardener or a beginner, this step-by-step guide will walk you through everything you need to know to set up your own rainwater harvesting system to keep your garden thriving sustainably.
Why Harvest Rainwater?
Before diving into the “how,” understanding the benefits can motivate you to adopt rainwater harvesting:
- Conservation: Saves potable water for drinking and other household uses by reducing garden water consumption.
- Cost Savings: Lowers water bills as rainwater is free.
- Better for Plants: Rainwater is naturally soft, free of salts and chemicals found in tap water, promoting healthier soil and plants.
- Reduces Runoff: Helps prevent soil erosion and stormwater pollution by capturing water that would otherwise run off roofs and pavement.
- Resilience: Provides a backup water supply during droughts or water restrictions.
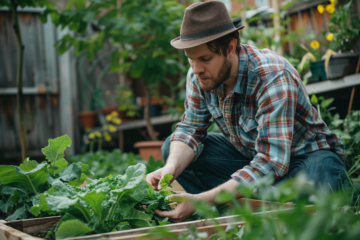
Step 1: Evaluate Your Garden’s Water Needs and Site Conditions
Start by assessing:
- Garden size and plant types: Larger gardens and water-thirsty plants will require more water.
- Average rainfall: Check your local weather data to estimate how much rain falls annually.
- Collection area: Typically, rooftops serve as the primary catchment area. The size and material affect the volume and quality of runoff.
- Available storage space: Where can you place your water tanks? Make sure it’s accessible and stable.
Formula to estimate potential harvest:
Catchment area (m²) × Rainfall (mm) × Runoff coefficient = Harvest volume (liters)
The runoff coefficient accounts for losses and varies by roof type (e.g., 0.8 for metal roofs).
Step 2: Choose Your Collection System Components
Catchment Surface:
- Most commonly, your house roof.
- Avoid catching from roofs with lead flashing or asbestos materials.
Gutters and Downspouts:
- Gutters capture rainwater and channel it to downspouts.
- Ensure gutters are clean and properly sloped for flow.
- Install downspout filters or debris screens to remove leaves and dirt.
First Flush Diverter (Optional but Recommended):
- This system diverts the initial dirty runoff away from the tank to avoid contaminants.
Storage Tanks:
- Options include plastic barrels, rain barrels, or larger cisterns.
- Size depends on garden needs and rainfall — common sizes are 200-1000 liters.
- Choose opaque tanks to prevent algae growth.
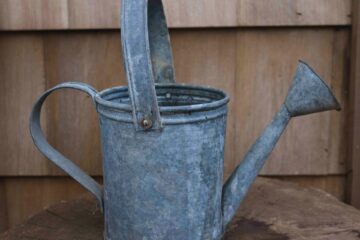
Delivery Method:
- Gravity-fed via hose or drip irrigation.
- Use a pump if necessary for pressure.
Step 3: Install the Rainwater Harvesting System
1. Clean Gutters and Set up Downspouts
- Remove debris and check for leaks.
- Attach downspout extensions or pipes leading to the tank.
2. First Flush Diverter Installation
- Typically placed in line between the downspout and tank.
- Diverts first liters of runoff and then allows cleaner water to pass to storage.
3. Position the Storage Tank
- Place on a leveled, sturdy base such as concrete or bricks to prevent tipping and support weight.
- If possible, elevate tanks to increase water pressure.
4. Connect Inlet and Outlet
- Connect the downspout to the tank inlet.
- Install a tap or valve at the tank’s base for easy water access.
5. Set up Overflow Mechanism
- Fit an overflow pipe to redirect excess water away safely once the tank is full.
Step 4: Maintenance Tips to Ensure System Efficiency
- Regular cleaning: Remove leaves, debris from gutters and filters monthly.
- Inspect tanks: Check for cracks, algae growth, and ensure lids are secure to prevent mosquitoes.
- Winter preparation: Drain tanks or insulate in colder climates to avoid freezing damage.
- Water quality: Use harvested rainwater only for irrigation, not for drinking, unless properly treated.
Step 5: Using and Managing Harvested Rainwater
- Use harvested water for vegetable beds, flowerpots, lawns, and trees.
- Connect rainwater tanks to drip irrigation or watering cans.
- Schedule watering during cooler parts of the day to minimize evaporation.
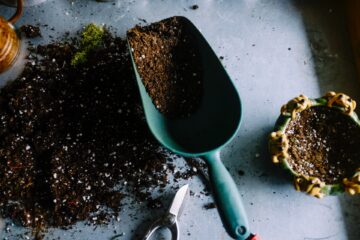
- Combine with mulch and soil conditioners to retain moisture in the garden.
Bonus Tips for Maximizing Rainwater Harvesting
- Plant drought-resistant species native to your region.
- Expand storage capacity with multiple tanks linked together.
- Add a UV filtration system if you want to disinfect water for household use.
- Implement water-smart gardening practices like grouping plants with similar water needs.
Final Thoughts
Installing a rainwater harvesting system for your home garden is an accessible, affordable way to conserve water, reduce your environmental footprint, and maintain a flourishing garden year-round. With just a few components and basic maintenance, you can unlock the many benefits of catching and using nature’s free resource.
By taking action today, you not only contribute to global water conservation efforts but also enjoy the satisfaction of nurturing your garden sustainably and efficiently. So rain or shine, your plants will always have a fresh supply of nourishing water!
If you’re ready to start, gather materials and begin with the simple steps above—your garden (and planet) will thank you!
<div id=”advert” style=”background-color: #EFF9F0; border: 1px solid #58BC61; padding: 25px; padding-botton: 25px;”><h4 style=”maring-top: -10px;”>Keep on top of your gardening with our free online journal</h4><p>Our free online tool allows you to organise your ideas and garden plans and help you be as efficient as possible in the garden.</p><span style=”background-color: #58BC61; padding: 10px;padding-left: 20px;padding-right:20px;margin-bottom: 50px;”><a href=”/journal/register” style=”color: #FFF; font-weight:bold; text-decoration: none; “>Sign up now</a></span></div>